Tutorial
This part describes how to reproduce the segmentations obtained in our paper, using pre-trained weights. First, please follow installation instructions .
Next, launch the segmentation GUI by typing following command into the terminal: /path/to/deep-finder/bin/segment
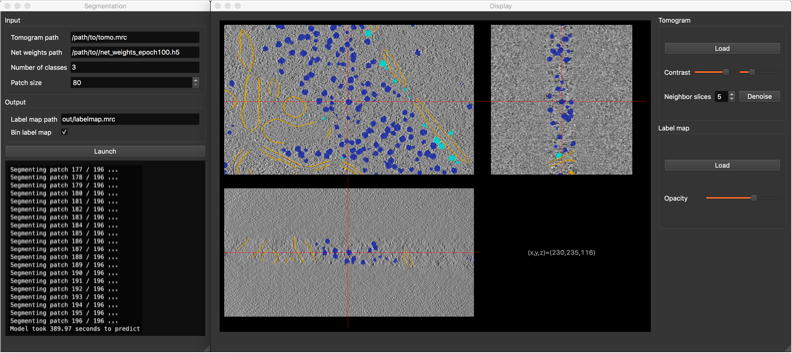
Segmentation GUI
In the segmentation window (left), please fill out requested fields as follows:
SHREC’19 dataset
- Tomogram path:
/path/to/deep-finder/examples/analyze/in/tomo9.mrc - Net weights path:
/path/to/deep-finder/examples/analyze/in/net_weights_FINAL.h5 - Number of classes: 13
Chlamydomonas dataset
Download the example tomogram here.
- Tomogram path:
/path/to/download/emd_3967.map - Net weights path:
/path/to/deep-finder/examples/training/out/net_weights_chlamydomonas.h5 - Number of classes: 4
After setting the patch size and your output path, click on button Launch. Progress about computation should be printed in the box below the button. Once computation is finished, the display window should pop up, showing the obtained segmentation, super-imposed with the tomogram, allowing you to inspect the result. For more details about segmentation and display windows, please see our Guide.